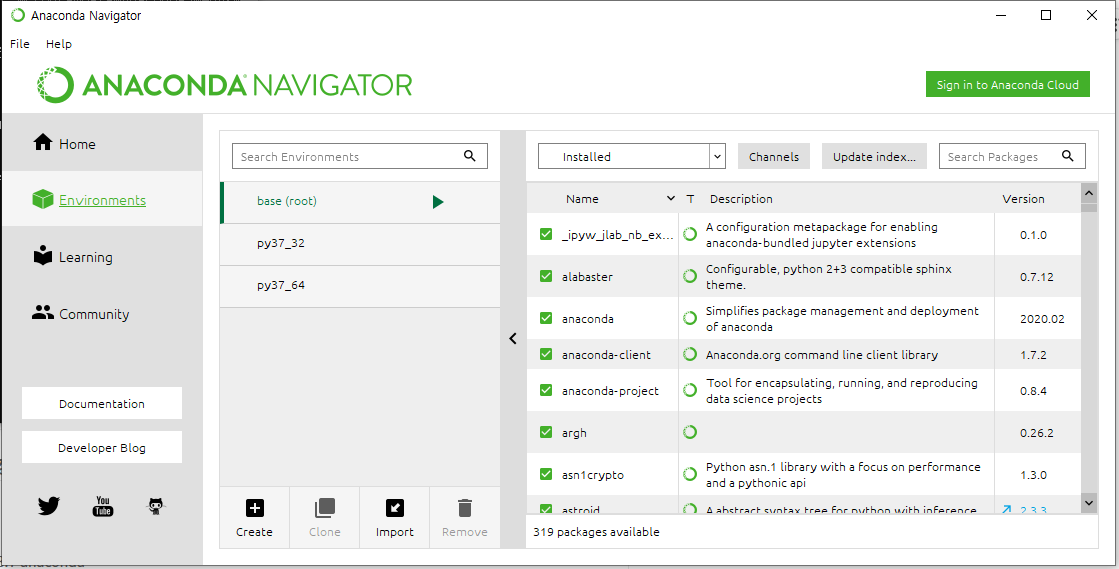
Anaconda Installers를 활용한 파이썬 설치 및 개발환경 설정

반응형

오늘 Anaconda 3.8 64bit버젼을 다시 설치를 하게되었는데,

32bit env환경에서 PyQt5 를 설치할 수가 없었습니다.

결국 해결은 했습니다만, 저처럼 고생하실 분들을 위해서 미리 적어둡니다.

혹시, 여기서 저와 같이 고생하시는 분들에게 도움이 된다면 좋겠습니다.


설치 오류났던 환경은 다음과 같습니다.

Windows10환경은 64bit 환경이라, 64-bit용 Anaconda를 설치하여 Python을 설치를 하게됩니다.

현재 최종버젼이 3.8버젼이라서, 이 버젼을 다운받아 설치를 했습니다.

주식 API를 사용하기 위해서는 32bit 가상환경을 만들어야만 하기에,

파이썬 버젼 3.8에 맞춰 가상환경을 만들었습니다.

>python -m pip install --upgrade pip

>set CONDA_FORCE_32BIT=1
>conda create -n py38_32 python=3.8 anaconda
>activate py38_32

문제는 여기서 부터 발생한것 같습니다.

추가로 pyqt5를 설치했는데.. 제대로 설치가 되지 않고, 오류가 계속 발생했습니다.

>pip install pyqt5
>pip install mpl_finance


오류유형1)

Could not find a version that satisfies the requirement PyQt5-sip

오류유형2)

DLL load failed when importing PyQt5


결국, 파이썬 python=3.8 을 사용한것이 문제인가 싶어서, python=3.7을이용했더니,

오류가 없어졌습니다.

결국, 정리하자면,

32bit env환경에서 Python 3.8버젼은 PyQt5와 호환되지 않는것 같다는 결론입니다.

1. env 삭제
>conda env remove -n py38_32

2. 폴더삭제
   C:\ProgramData\Anaconda3\envs\py38_32

3. env다시 생성
>set CONDA_FORCE_32BIT=1
>conda create -n py37_32 python=3.7 anaconda
>activate py37_32
>conda env list

>pip install pyqt5
>pip install mpl_finance


위 작업들은 anaconda prompt를 사용하여 설치를 했습니다.

추가로, 현재 설치된 파이썬의 버젼을 확인해 보겠습니다.

(py37_32) C:\Windows\system32>python -V
Python 3.8.5

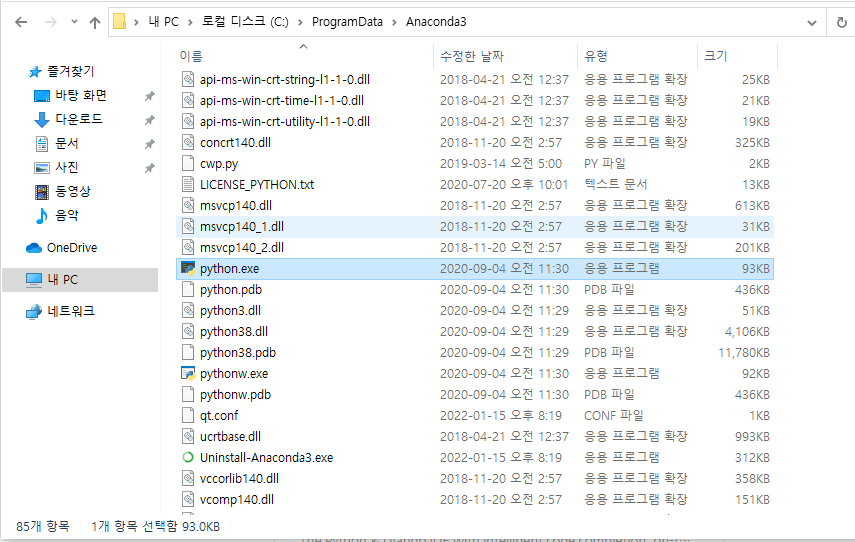
파이선이 설치되어 있는 위치 확인하기

반응형

댓글()

No module named 'talib'

반응형

TA_Lib-0.4.19-cp37-cp37m-win32.whl
0.36MB

[파이썬] TA-LIB 파이썬 패키지 설치

ta-lib란?
주식 차트의 기술적 분석을 위한 200여 가지의 지표 함수를 제공하는 C 라이브러리인데, 파이썬으로 포팅되어있다.
– 공식홈페이지: http://ta-lib.org/
– 함수 목록: http://ta-lib.org/function.html
– Python 패키지 및 엑셀 플러그 인 제공
https://github.com/mrjbq7/ta-lib
http://mrjbq7.github.io/ta-lib/doc_index.html

설치로그:나의 오후를 잡아 먹은 삽질을 정리해보았다.
앞서 아나콘다4.2.0(파이썬3.7) 32비트 버전과 zipline이 설치된 상태에서

# 소스코드 컴파일하여 설치하는 방법(Install TA-Lib C Library on Windows 10)

http://timebird.egloos.com/7390887 

  1. Download and Unzip ta-lib-0.4.0-msvc.zip(https://github.com/mrjbq7/ta-lib)
  2. Move the Unzipped Folder ta-lib to C:\
  3. Download and Install Visual Studio Community 2015 또는 Visual C++ Build Tools
  4. Build TA-Lib Library
    4-1) 명령프롬프트 실행 [VS2015 x86 Native Tools Command Prompt]
    4-2) C:\ta-lib\c\make\cdr\win32\msvc 로 이동
    4-3) nmake 실행
  5. [Anaconda Prompt] 실행(관리자권한으로 실행 추천)
  6. pip install ta-lib
  7. 임포트시 RuntimeError: module compiled against API version 0xb but this version of numpy is 0xa 같은 에러가 나는 경우 numpy업그레이드(pip install numpy –upgrade)

# 비공식 윈도우용 바이너리로 설치하는 방법(Unofficial Windows Binaries for Python Extension Packages)

  1. https://www.lfd.uci.edu/~gohlke/pythonlibs/#ta-lib 로 이동
  2. c:\TA_Lib-0.4.21-cp37-cp37m-win32.whl 을 다운받는다(32비트  파이썬3.7용 TA-Lib)
  3. [Anaconda Prompt] 실행
  4. pip install c:\TA_Lib-0.4.21-cp37-cp37m-win32.whl


반응형

댓글()

TypeError: can't compare offset-naive and offset-aware datetimes

반응형

파이썬 프로그램에서 날자값을 비교하다보면 자주 접하는 오류가 

TypeError: can't compare offset-naive and offset-aware datetimes 인것 같습니다.


Error Code:

last_time = pd.to_datetime(self.chart_data[stockCode][-1:].time[0])
now = datetime.now()

if self.prev_time == last_time or self.prev_time >= last_time: # TypeError 발생부분
return

해결방법은 다음과 같습니다.


원인: 파이썬에서는 기본적으로 datetime 오브젝트는 aware가 아닌 "naive" 타입입니다.

        그래서, 비교 하려는 두 값 모두 같은 type의 오브젝트 여야 합니다.


Sampe Code:

import datetime
import pytz utc=pytz.UTC

challenge.datetime_start = utc.localize(challenge.datetime_start)

challenge.datetime_end = utc.localize(challenge.datetime_end)

# 이제 두개의 datetime 오브젝트는 모두 aware 타입이 되었으므로 비교가 가능합니다.

헷갈리시면, 다음과 같이 사용하셔도 됩니다.

start_time = challenge.datetime_start.replace(tzinfo=utc)
end_time = challenge.datetime_end.replace(tzinfo=utc)


참고로, datetime.timezone에 대해서 알아볼께요.

UTC를 기준으로 시간이 빠르면 +시차, 시간이 느리면 -시차로 표시합니다.

시간대나라코드

UTC-5 미국(동부) EST
UTC 영국 GMT
UTC+8 대만 TW
UTC+9 대한민국 KST
UTC+9 일본 JST
UTC+10 오스트레일리아(동부) AEST
  • 나라별 시간대 차이에 대한 더 자세한 내용은 여기를 참고해주세요.


참조사이트:

stackoverflow.com/questions/15307623/cant-compare-naive-and-aware-datetime-now-challenge-datetime-end


Can't compare naive and aware datetime.now() <= challenge.datetime_end

I am trying to compare the current date and time with dates and times specified in models using comparison operators: if challenge.datetime_start <= datetime.now() <= challenge.datetime_end:...

stackoverflow.com

spoqa.github.io/2019/02/15/python-timezone.html


파이썬의 시간대에 대해 알아보기(datetime.timezone)

파이썬의 시간대에 대해서 알아봅니다.

spoqa.github.io


반응형

댓글()

Python data Type - Datetime

반응형

자주 사용하게 되지만, 자주 헷갈리는 Python의 자료형에 대해서 정리를 해 나가겠습니다.

오늘은 Datetime입니다.


주어진 String값을 DateTime형식으로 바꾸기: strptime


Example 1: string to datetime object

from datetime

import datetime


date_string = "21 June, 2018"


print("date_string =", date_string)

print("type of date_string =", type(date_string))


date_object = datetime.strptime(date_string, "%d %B, %Y")


print("date_object =", date_object)

print("type of date_object =", type(date_object))


실행경과>

date_string = 21 June, 2018
type of date_string = <class 'str'>
date_object = 2018-06-21 00:00:00
type of date_object = <class 'datetime.datetime'>

Example 2: string to datetime object

from datetime

import datetime

dt_string = "12/11/2018 09:15:32"

# Considering date is in dd/mm/yyyy format

dt_object1 = datetime.strptime(dt_string, "%d/%m/%Y %H:%M:%S")

print("dt_object1 =", dt_object1)

# Considering date is in mm/dd/yyyy format

dt_object2 = datetime.strptime(dt_string, "%m/%d/%Y %H:%M:%S")

print("dt_object2 =", dt_object2)

실행경과>

dt_object1 = 2018-11-12 09:15:32
dt_object2 = 2018-12-11 09:15:32


Format Code List

The table below shows all the format codes that you can use.

Directive Meaning Example
%a Abbreviated weekday name. Sun, Mon, ...
%A Full weekday name. Sunday, Monday, ...
%w Weekday as a decimal number. 0, 1, ..., 6
%d Day of the month as a zero-padded decimal. 01, 02, ..., 31
%-d Day of the month as a decimal number. 1, 2, ..., 30
%b Abbreviated month name. Jan, Feb, ..., Dec
%B Full month name. January, February, ...
%m Month as a zero-padded decimal number. 01, 02, ..., 12
%-m Month as a decimal number. 1, 2, ..., 12
%y Year without century as a zero-padded decimal number. 00, 01, ..., 99
%-y Year without century as a decimal number. 0, 1, ..., 99
%Y Year with century as a decimal number. 2013, 2019 etc.
%H Hour (24-hour clock) as a zero-padded decimal number. 00, 01, ..., 23
%-H Hour (24-hour clock) as a decimal number. 0, 1, ..., 23
%I Hour (12-hour clock) as a zero-padded decimal number. 01, 02, ..., 12
%-I Hour (12-hour clock) as a decimal number. 1, 2, ... 12
%p Locale’s AM or PM. AM, PM
%M Minute as a zero-padded decimal number. 00, 01, ..., 59
%-M Minute as a decimal number. 0, 1, ..., 59
%S Second as a zero-padded decimal number. 00, 01, ..., 59
%-S Second as a decimal number. 0, 1, ..., 59
%f Microsecond as a decimal number, zero-padded on the left. 000000 - 999999
%z UTC offset in the form +HHMM or -HHMM.  
%Z Time zone name.  
%j Day of the year as a zero-padded decimal number. 001, 002, ..., 366
%-j Day of the year as a decimal number. 1, 2, ..., 366
%U Week number of the year (Sunday as the first day of the week). All days in a new year preceding the first Sunday are considered to be in week 0. 00, 01, ..., 53
%W Week number of the year (Monday as the first day of the week). All days in a new year preceding the first Monday are considered to be in week 0. 00, 01, ..., 53
%c Locale’s appropriate date and time representation. Mon Sep 30 07:06:05 2013
%x Locale’s appropriate date representation. 09/30/13
%X Locale’s appropriate time representation. 07:06:05
%% A literal '%' character. %


보다 많은 예시와 설명을 하기에서 참조하시면 됩니다.

www.programiz.com/python-programming/datetime/strptime

반응형

댓글()

Python의 독립적인 가상 실행 환경(Environment)을 위한 Anaconda env 설정 방법

반응형

아나콘다 패키지로 설치한 후, conda 명령어를 이용해서 env를 생성/삭제 및 관리한다.


1. anaconda 64bit 설치

  https://www.anaconda.com/products/individual#download-section


Individual Edition | Anaconda

🐍 Open Source Anaconda Individual Edition is the world’s most popular Python distribution platform with over 20 million users worldwide. You can trust in our long-term commitment to supporting the Anaconda open-source ecosystem, the platform of choice

www.anaconda.com


python 3.7버젼 64bbit를 선택한다.

repo.anaconda.com/archive/Anaconda3-2020.02-Windows-x86_64.exe

주의: python 홈페이지에 가서 python을 다운받지 말자. Anaconda 설치를 하면 python이 자동으로 설치가 된다.

      이제 anaconda 홈페이지로 가서 다운을 받자. 64 bit 최신버전을 다운로드하도록 하자.

      https://youngjoongkwon.com/2018/01/26/windows-%ED%99%98%EA%B2%BD%EC%97%90%EC%84%9C-anaconda-tensorflow-%EC%84%A4%EC%B9%98%EB%AC%B8%EC%A0%9C-%ED%95%B4%EA%B2%B0%ED%95%98%EA%B8%B0-no-module-named-tensorflow-%EC%97%90%EB%9F%AC/


Windows 환경에서 Anaconda + Tensorflow 설치문제 해결하기 (No module named ‘tensorflow’ 에러 해결법)

python을 따로 설치한 다음 anaconda를 설치하고, tensorflow를 설치했다가 No module named ‘tensorflow’ 에러가 떴다. 물론 tensorflow는 실행할 수 없었다. 검색을 해보니 나와 비슷한 문제를 겪고있는 사람��

youngjoongkwon.com


2. Anaconda Prompt 실행

python version이 3.7.6임을 확인한다.

  tenserflow가 3.8버젼을 지원하지 않습니다. 3.7버젼도 3.7.6 안전한 검증된 버젼으로 설치를 권장합니다.

  (추가)

  anaconda 64bit 설치후, 제일 먼저 해주세요..
  >python -m pip install --upgrade pip

3. Python 3.8(최신) 버전의 ‘py38_32’라는 이름으로 32bit용 env를 생성합니다. 

   (키움과 같은 주식 API는 아직 32bit만 지원하므로, 32bit 가상환경을 별도로 만들어야 합니다.)

>set CONDA_FORCE_32BIT=1
>conda create -n py37_32 python=3.7 anaconda
>activate py37_32
>conda env list

4. 추가적으로 64bit용 가상환경도 별도설치하여 향후 64bit환경 개발시 사용하도록 한다.

>conda deactivate

>set CONDA_FORCE_64BIT=1
>conda create -n py38_64 python=3.8 anaconda
>activate py38_64

>pip install tensorflow  

   * Python을 anaconda에서 설치한 버젼과 달리, 별도로 설치할 경우,

     tensorflow가 설치되지 않습니다. 주의해 주세요~

5. Anaconda에서 생성한 env환경을 확인합니다. 


6. 가상환경 제거하기

>conda remove -n py37_32 --all

>conda remove -n py38_64 --all


7. 최신버젼의 tensorflow를 설치한다.

>pip install tensorflow
or 
>py -m pip install tensorflow
or
>python -m pip install --user --upgrade pip
반응형

댓글()